> ## Documentation Index
> Fetch the complete documentation index at: https://unstructured-53-kapa-ai.mintlify.site/llms.txt
> Use this file to discover all available pages before exploring further.
# PostgreSQL
> This page contains the information to store processed data to a PostgreSQL database.
## Prerequisites
* PostgreSQL Server Hostname
* Database Name and Port Number
* Username and Password for Database Access
For more information, please refer to [PostgreSQL documentation](https://www.postgresql.org/docs/).
Ensure that the index schema is compatible with the data you intend to write. If you need guidance on structuring your schema, consult the [Sample Index Schema](/open-source/ingest/destination-connectors/sql#sample-index-schema) for reference.
## Step-by-Step Guide
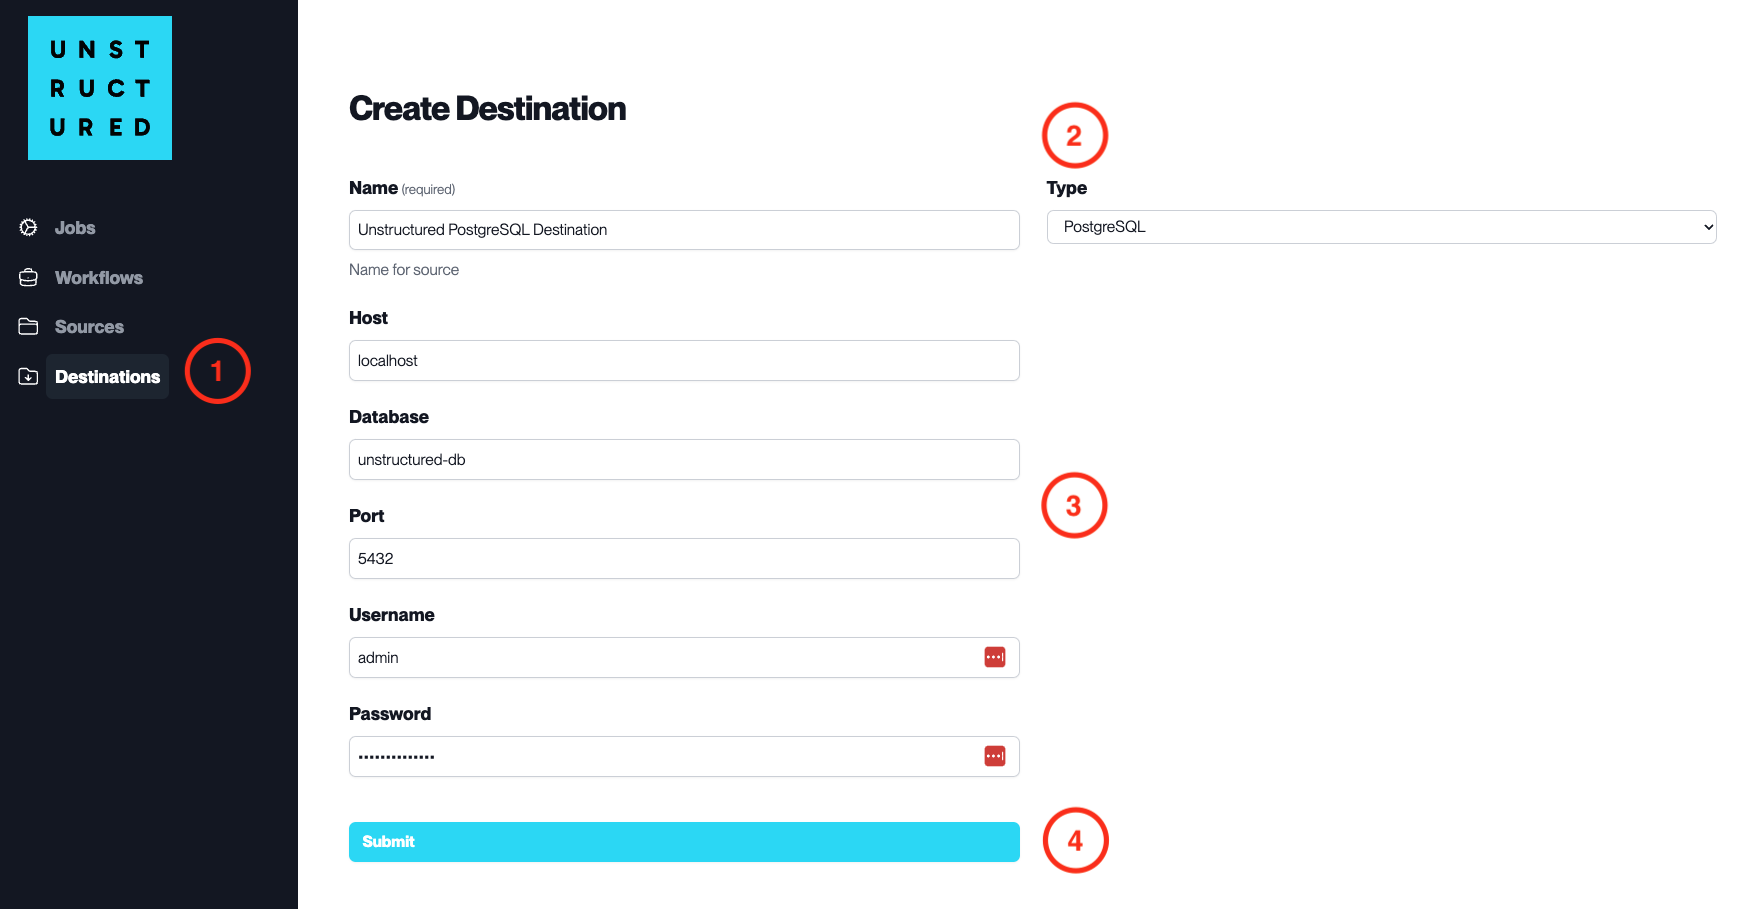
1. **Access the Create Destination Page**. Navigate to the “Destinations” section within the platform’s side navigation menu and click on “New Destination” to initiate the setup of a new destination for your processed data.
2. **Select Destination Type**. Select **PostgreSQL** destination connector from the `Type` dropdown menu.
3. **Configure Destination Details**
* `Name` (*required*): Assign a descriptive name to the new destination connector.
* `Host` (*required*): Enter the hostname or IP address of the PostgreSQL server.
* `Database` (*required*): Provide the name of the PostgreSQL database.
* `Port`: Specify the port number for the PostgreSQL server (default is 5432).
* `Username`: Input the username for the PostgreSQL database access.
* `Password`: Enter the password associated with the username.
4. **Submit**. Review all the details entered to ensure accuracy. Click ‘Submit’ to finalize the creation of the Destination Connector. The newly completed PostgreSQL connector will be listed on the Destinations dashboard.