> ## Documentation Index
> Fetch the complete documentation index at: https://unstructured-53-kapa-ai.mintlify.site/llms.txt
> Use this file to discover all available pages before exploring further.
# Amazon S3
> This page contains the information to ingest your documents from Amazon S3 buckets.
## Prerequisites
* AWS Account and API Key
* S3 Bucket
* IAM User with S3 Access
For more information, please refer to [Amazon S3 documentation](https://docs.aws.amazon.com/AmazonS3/latest/userguide/Welcome.html).
## Step-by-Step Guide
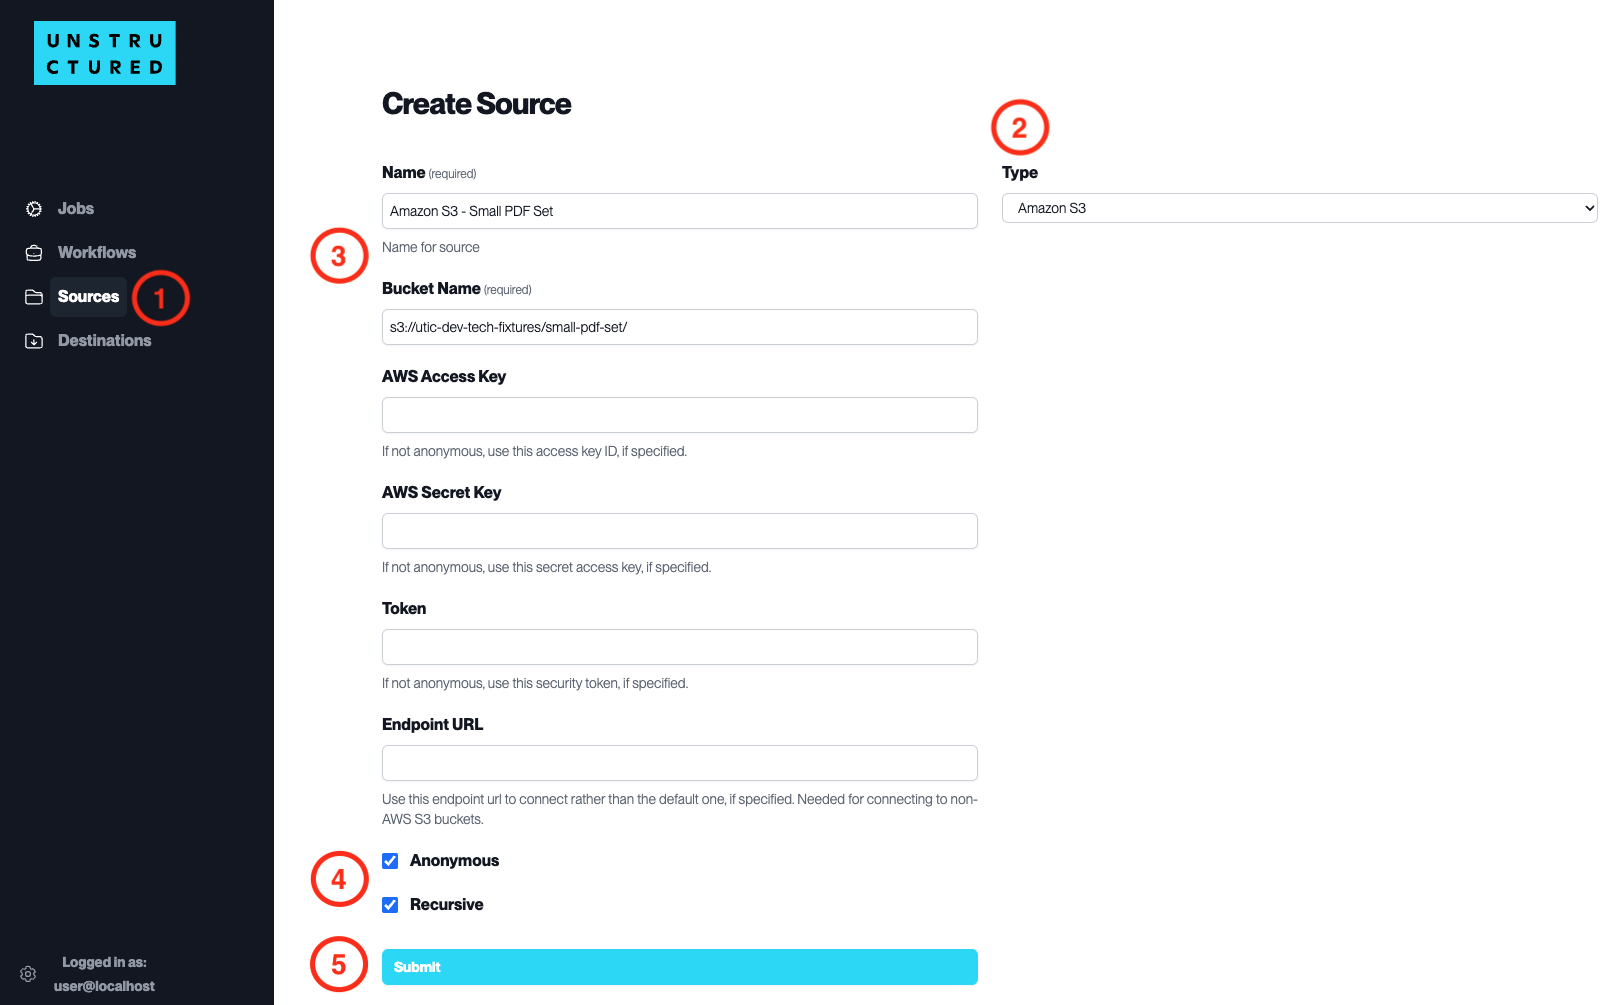
1. **Access the Create Source Page**. Navigate to the “Sources” section on the left sidebar and click the “New Source” button.
2. **Select Source Type**. Select **Amazon S3** from the `Type` dropdown menu.
3. **Configure Source Details to connect to the AWS Platform**
* `Name` (*required*): Enter a unique name for your source to identify it within the platform.
* `Bucket Name` (*required*): Provide the name of your Amazon S3 bucket.
* `AWS Access Key`: Enter your AWS access key ID if your bucket is private. Leave blank if anonymous access is configured.
* `AWS Secret Key`: Enter your AWS secret access key corresponding to the above access key ID.
* `Token`: If required, enter the security token for temporary access.
* `Endpoint URL`: Specify a custom URL if you connect to a non-AWS S3 bucket.
4. **Additional Settings**
* Check `Anonymous` if you are connecting to a bucket with public access and don’t want to associate the connection with your account.
* Check `Recursive` if you want the platform to ingest data from sub-folders within the bucket.
5. **Submit**. After filling in the necessary information, click ‘Submit’ to create the Source Connector. The newly completed connector will be listed on the Sources dashboard.