> ## Documentation Index
> Fetch the complete documentation index at: https://unstructured-53-kapa-ai.mintlify.site/llms.txt
> Use this file to discover all available pages before exploring further.
# Sharepoint
> This page contains the information to ingest your documents from Sharepoint sites.
## Prerequisites
* Sharepoint Site URL
* Client ID and Client Credential with access to the Sharepoint instance
For more information, please refer to [Sharepoint Online documentation](https://docs.microsoft.com/en-us/sharepoint/dev/).
## Step-by-Step Guide
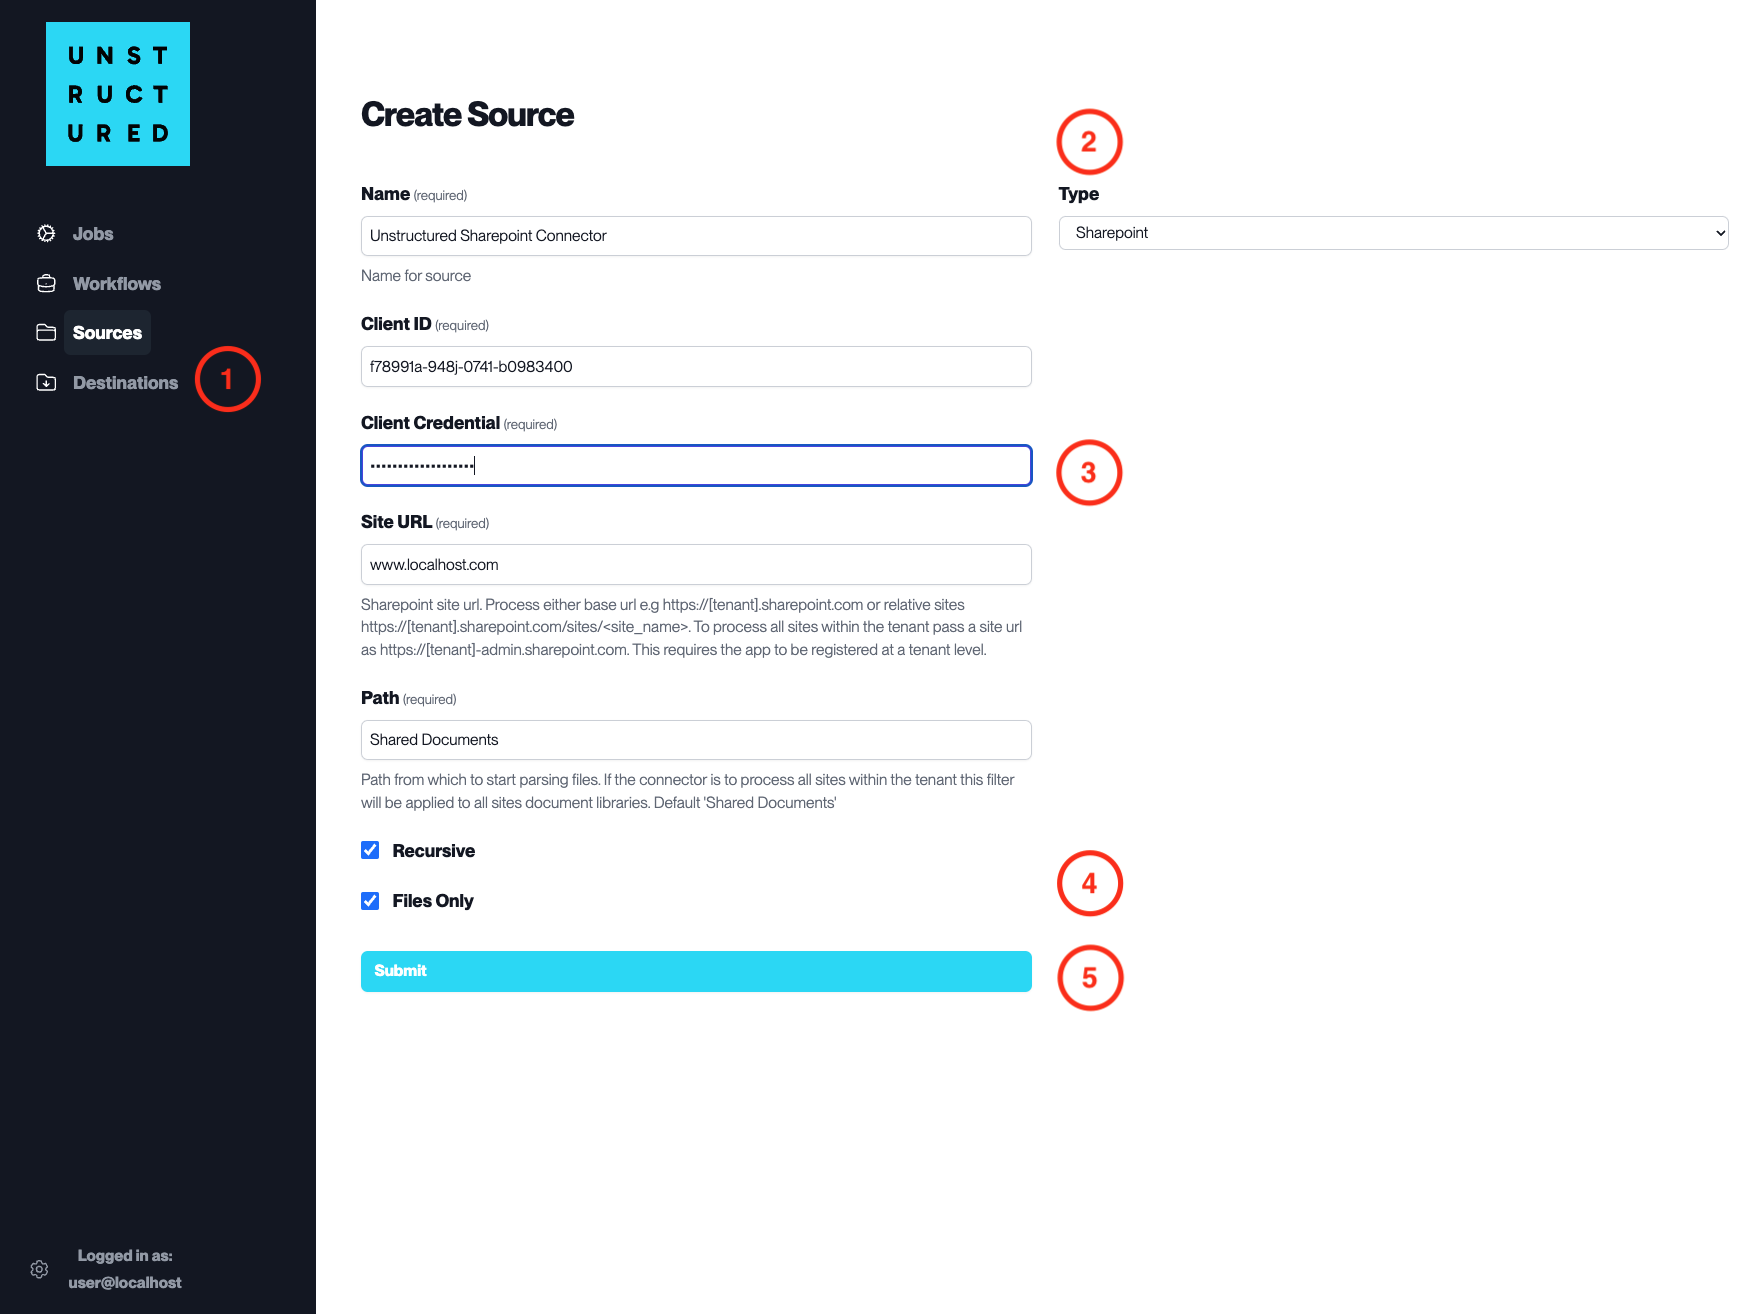
1. **Access the Create Source Page**. Navigate to the “Sources” section on the left sidebar and click the “New Source” button.
2. **Select Source Type**. Select **Sharepoint** from the `Type` dropdown menu.
3. **Configure Source Details to connect to Sharepoint**
* `Name` (*required*): Enter a unique name for the Sharepoint source connector.
* `Client ID` (*required*): Input the Client ID provided by Sharepoint for app registration.
* `Client Credential` (*required*): Enter the Client Credential (secret or certificate) associated with the Client ID.
* `Site URL` (*required*): Provide the base URL of the Sharepoint site you wish to connect to.
* `Path` (*required*): Specify the path from which to start parsing files. Default is “Shared Documents”.
4. **Additional Settings**
* Check `Recursive` if you want the platform to recursively ingest data from sub-folders within the specified path.
* Check `Files Only` if you want the platform to ingest files without considering the folder structure.
5. **Submit**. After filling in the necessary information, click ‘Submit’ to create the Source Connector. The newly completed Sharepoint connector will be listed on the Sources dashboard.