Prerequisites
- Host URL for Databricks workspace
- Account ID for Databricks
- Username and Password for Databricks authentication (if applicable)
- Personal Access Token for Databricks
- Cluster ID
- Catalog, Schema, and Volume within Databricks
Step-by-Step Guide
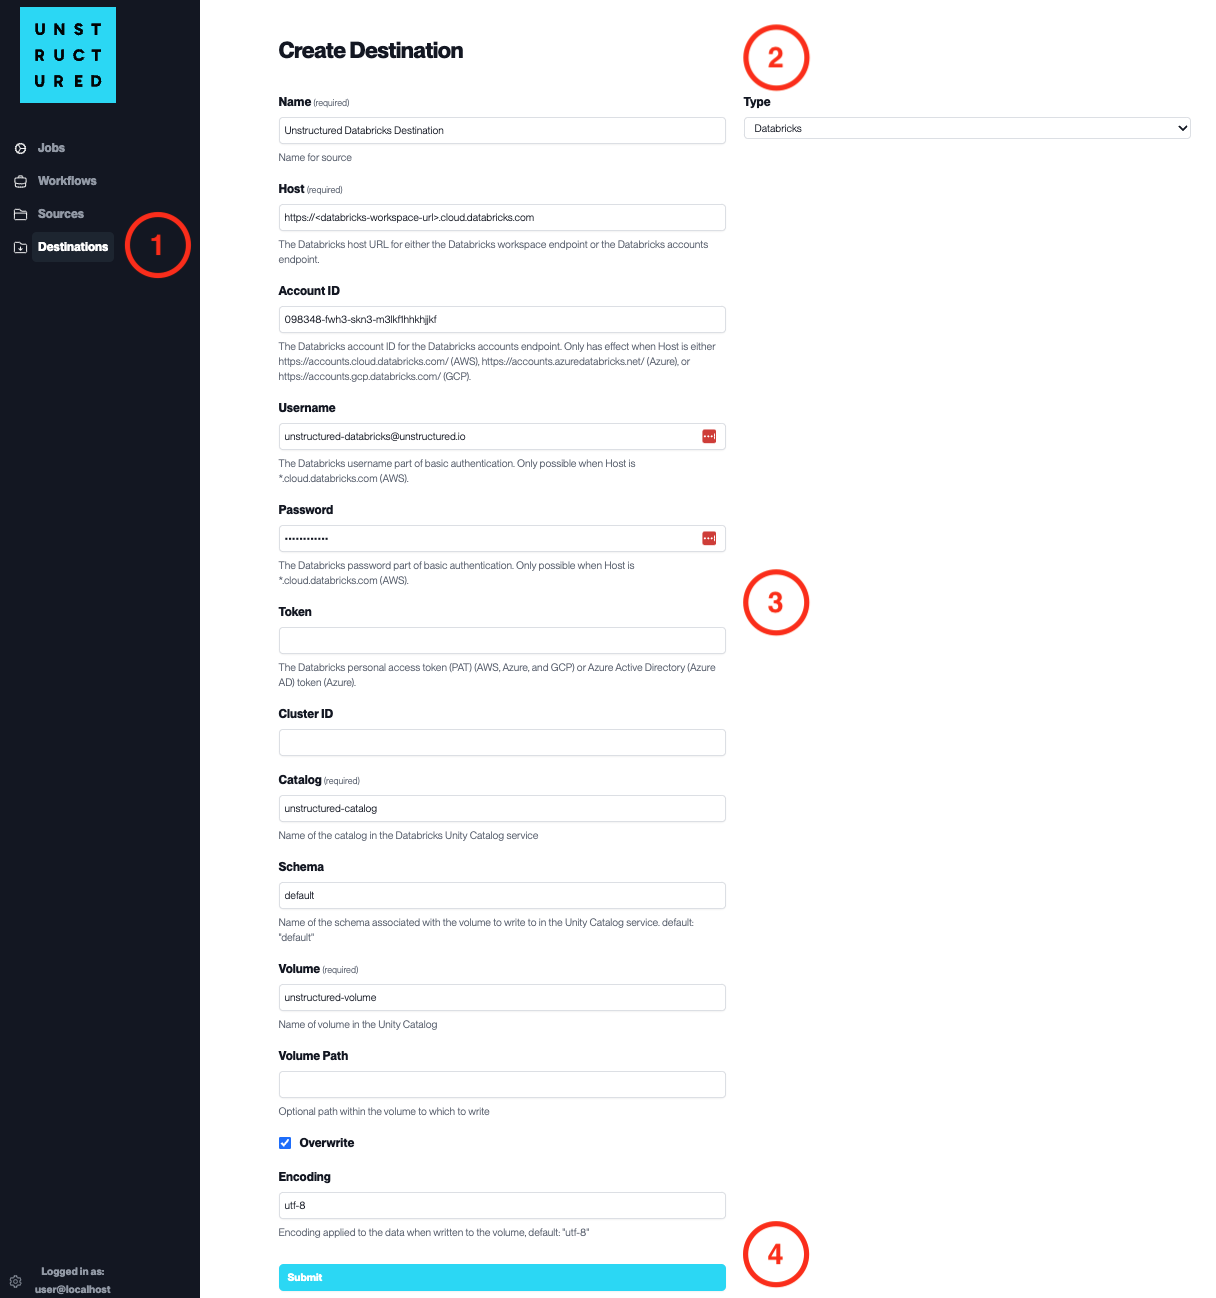
- Access the Create Destination Page. Navigate to the “Destinations” section within the platform’s side navigation menu and click on “New Destination” to initiate the setup of a new destination for your processed data.
-
Select Destination Type. Select Databricks destination connector from the
Typedropdown menu. - Configure Destination Details
-
Name(required): Assign a descriptive name to the new destination connector. -
Host(required): Enter the Databricks workspace host URL. -
Account ID: Specify the Databricks account ID. -
Username: Provide the Databricks username. -
Password: Enter the Databricks password. -
Token: Input the Databricks personal access token. -
Cluster ID: Indicate the Databricks cluster ID. -
Catalog(required): Name of the catalog in the Databricks Unity Catalog service. -
Schema: Specify the schema associated with the volume. -
Volume(required): Name of the volume in the Unity Catalog. -
Volume Path: Provide an optional path within the volume to which to write. -
Check
Overwriteif existing data should be overwritten. -
Encoding: Select the encoding applied to the data when written to the volume.
- Submit. Review all the details entered to ensure accuracy. Click ‘Submit’ to finalize the creation of the Destination Connector. The newly completed Databricks connector will be listed on the Destinations dashboard.